

How To Jailbreak Ios 13 On Windows
Y'all will need to jailbreak your iOS device before you can bypass the iCloud activation lock.
The Windows organisation does not have a jailbreak tool, so to jailbreak your iOS device, y'all will need to create a Linux Ubuntu environment on your Windows computer by following our tried and tested tutorial.
Annotation:
- Supported device models on iOS 14.x for jailbreaking: A10/A10X devices are fully supported – iPhone 6s\6s plus\7\7plus, iPad (2018, 6th generation)\iPad (2019, 7th generation), iPod touch (2019, seventh generation).
- A11 devices on iOS 14.x take limited back up (Options > Skip A11 BPR cheque) – iPhone 8\8 Plus\X. Do not set a Passcode, Password, Touch on ID or Face ID once jailbreaking of all devices has been completed.
- We advise that you jailbreak your iOS device on a Mac reckoner first, if you take access to a estimator which runs MacOS 10.thirteen – ten.xv.
- If you accept an iPhone 5S, we advise that you jailbreak your device on a Mac estimator, since our tests indicate that the following jailbreaking procedure is unlikely to be successful for this device model.
Bank check out a more simpler method of jailbreaking iPhone on Windows, it only takes 5 minutes to consummate.
Requirements for Jailbreaking iOS on Windows
To jailbreak iOS devices on Windows, the following are required:
- Windows 7 or later, 32 or 64 flake
- USB flash drive with a chapters of ii GB or more
- Download ubuntu.iso file
- Download rufus-3.10p.exe to create a USB drive of Ubuntu
- Download checkra1n-x86_64 file to jailbreak iOS in Ubuntu
Video Tutorial: How to Jailbreak iOS Device on Windows
Step-past-Footstep Tutorial: How to Jailbreak iOS on Windows
Phase one. Creating a USB Wink Drive of Ubuntu
Step 1. Plug your USB flash drive into your computer.
Step 2. Download and run the rufus-3.10p.exe awarding – it is not necessary to install this on your reckoner. When the application has downloaded, it will be set up to use.
Pace 3. Click "Select", and then locate the downloaded Ubuntu image. Select the "ubuntu-xx.04.1-desktop-amd64.iso" file,
which volition then be visible in the boot choice. Ensure that the other options are prepare to default, then select "Commencement".

Footstep four. A alert will be displayed informing you that this process will erase any data on your live USB. Before selecting "OK", please ensure that y'all have backed up your USB data if required.
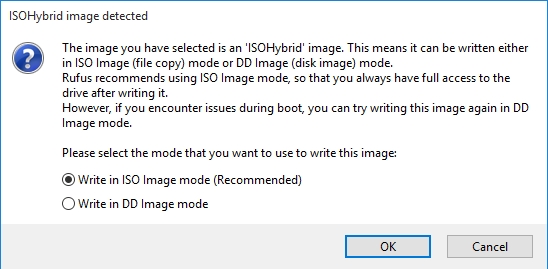
When an ISOHybrid image has been detected, please choose the recommended choice and select "OK".
Rufus will create the USB flash drive of Ubuntu, which should take ii-3 minutes.

Once the process is complete, please select "Close".

Note: Once the Ubuntu drive has been created, delight reconnect the USB flash drive to your computer to ensure that your calculator recognizes information technology.
Phase ii. Booting Ubuntu on Windows
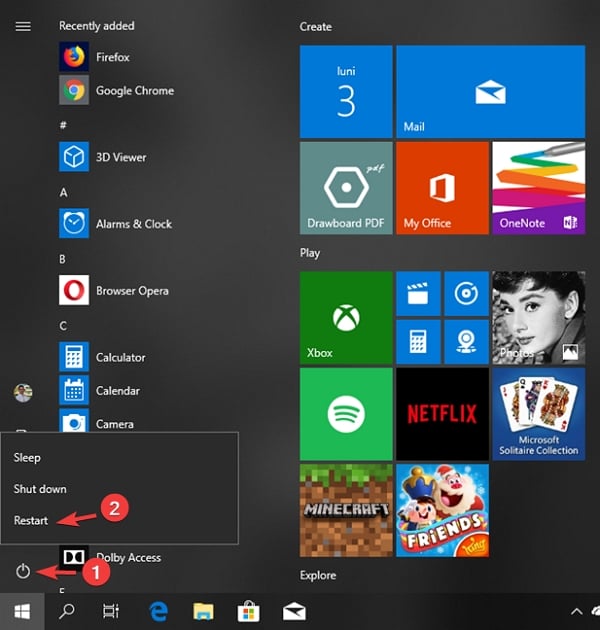
Step 5. Select "Windows", and then restart your calculator by selecting "Restart".
As your reckoner is restarting and prior to the operating arrangement loading, press the F12 shortcut key. Here is an example of my Dell estimator.

Note: Generally, F12 is the shortcut key to launch BIOS on most brands of computer, only if the F12 key fails to launch BIOS on your computer, y'all volition demand to discover the correct shortcut primal for your figurer brand.
| Kicking Shortcut Key | Desktop Make | Laptop Brand | Motherboard Make |
|---|---|---|---|
| ESC | Dell | ASUS, Sony | MAXSUN, UNIKA, SUPOX, Spark, SOYO, EPOX, UNIKA, Jetway, J&W, Colorful, ECS, SOYO, FOXCONN |
| F8 | ASUS, BenQ | ASUS, YESTON, J&Westward | |
| F9 | HP, BenQ | BIOSTAR, GUANMING | |
| F10 | ASL | ||
| F11 | MSI | MSI, ASRock, ONDA, Colorful, ECS, Gamen, Topstar | |
| F12 | Lenovo, HP, Acer, Hasee, eFound, THTF, Haier | Thinkpad, Dell, Lenovo, TOSHIBA, Samsung, IBM, Acer, Hasee, Haier, eFound, THTF, GIGABYTE, Gateway, eMachines | GIGABYTE, Intel, Cthim, SOYO, FOXCONN, Gamen, Topstar |
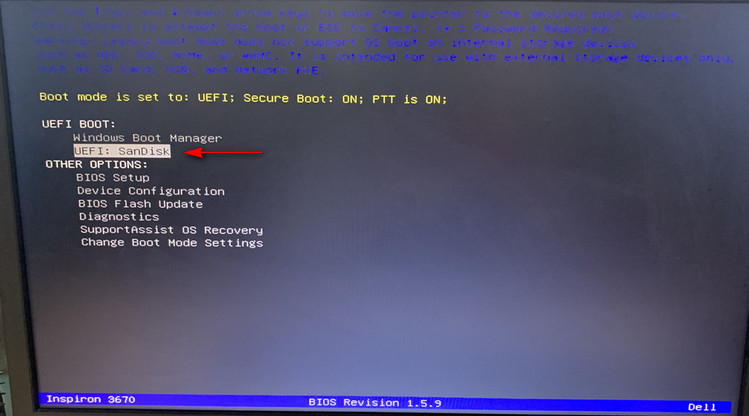
Once the correct shortcut key has been pressed, your computer volition display the BIOS control window. Past using the pointer keys on your keyboard, you lot will need to select the Ubuntu USB flash drive which you lot accept just created, so press "Enter".
Footstep six. The Ubuntu organisation will brainstorm loading and will conduct out all filesystem checks, as beneath.
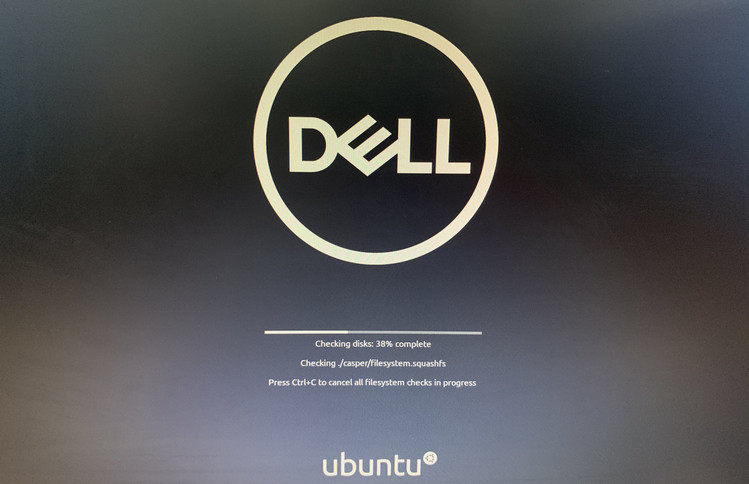
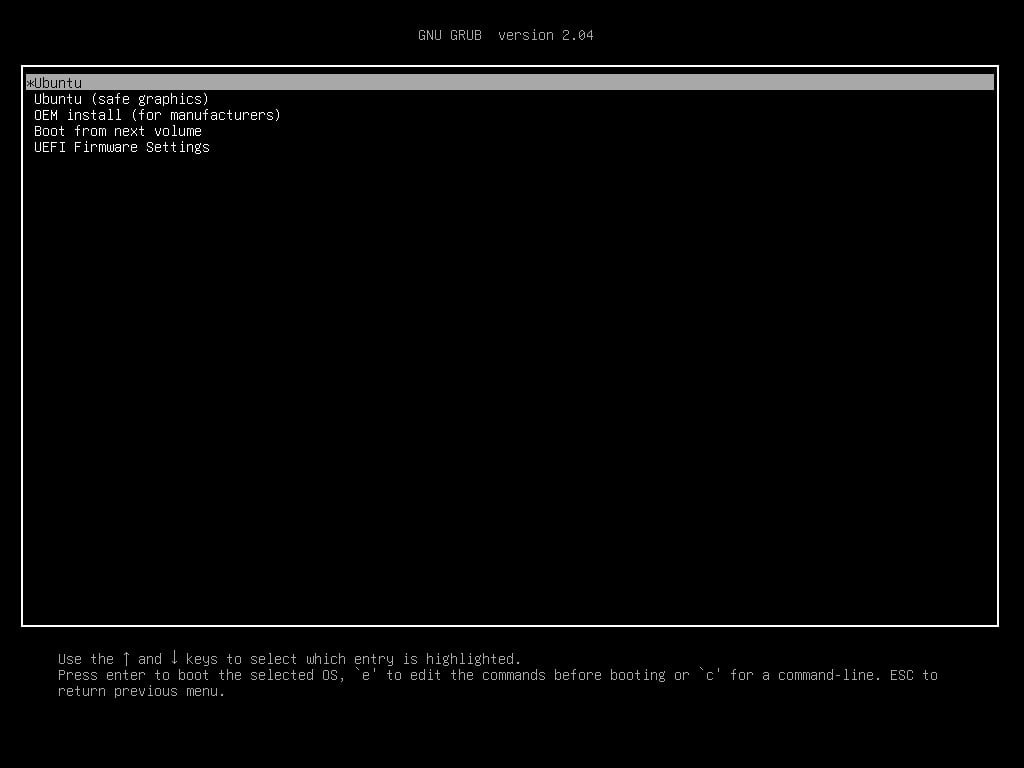
In order to boot the Ubuntu OS, please select the start option "*Ubuntu".
Step seven. Once booting is consummate, initiate Ubuntu from the flash drive by selecting "Try Ubuntu".

At present you have entered the Ubuntu system, delight ensure that your iPhone/iPad/iPod touch on remains continued to your figurer. Your device should appear on your desktop.

Phase three. Jailbreaking Your iOS Device
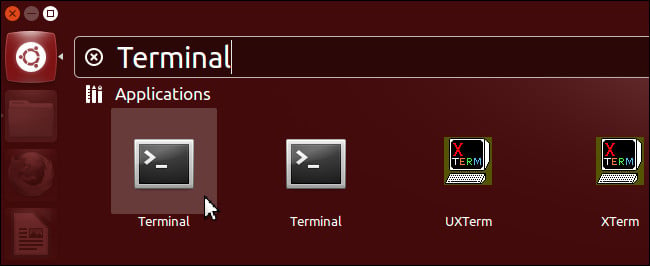
Pace 8. Locate the previously downloaded jailbreaking tool "checkra1n-x86_64". If this file has not already been downloaded prior to restarting your computer, you will be able to download it via a browser now. You volition accept to use Terminal to open the Checkra1n jailbreaking tool.
In one case you take opened Final, y'all volition demand to enter the following codes in sequence (the codes can be copied directly from the quotations):
Enter "chmod + x " (make sure there is a space before the plus sign and a infinite afterward the ten). Drag the "checkra1n-x86_64" file to the Terminal window, and then press "Enter".
Enter "sudo " (make certain there is a space after sudo). Drag the "checkra1n-x86_64" file to the Final window again, so press "Enter".

Annotation: If yous are unable to drag the Checkra1n file to Terminal, delight copy and paste the file on your desktop. Correct click the file, so select "Testify in Files". Now, effort dragging the file to Terminal again.
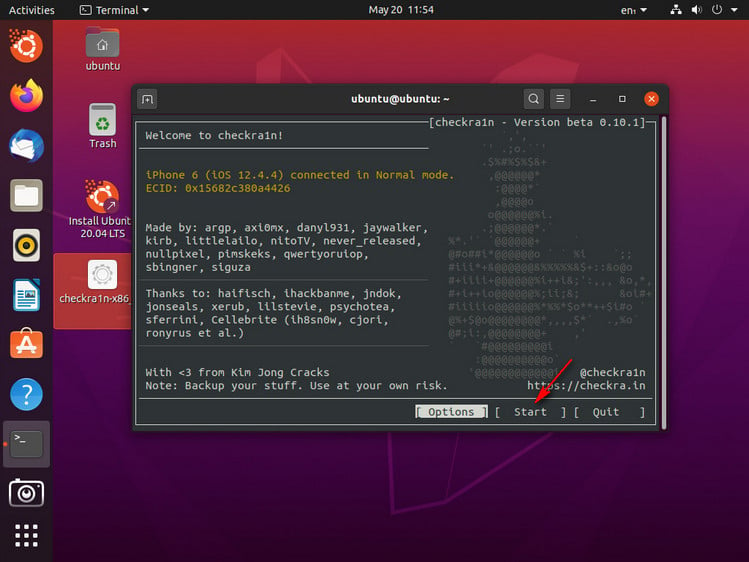
If you take entered the codes correctly in the last stride, Checkra1n should be running and the following screen will be displayed:
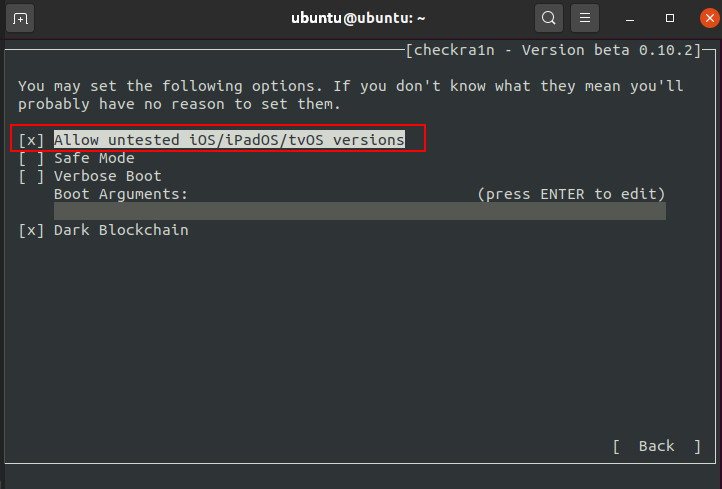
FAQ: What if the Checkra1n "Start" Button Is Greyed Out?
The "Start" push will be greyed out if your device is running a version not previously tested by Checkra1n, particularly iOS 13.five.ane and xiii.half-dozen. To exist able to use the button, you will need to select "Options" and so "Allow untested iOS/iPadOS/tvOS versions". Next, select "Dorsum" followed by "Start".
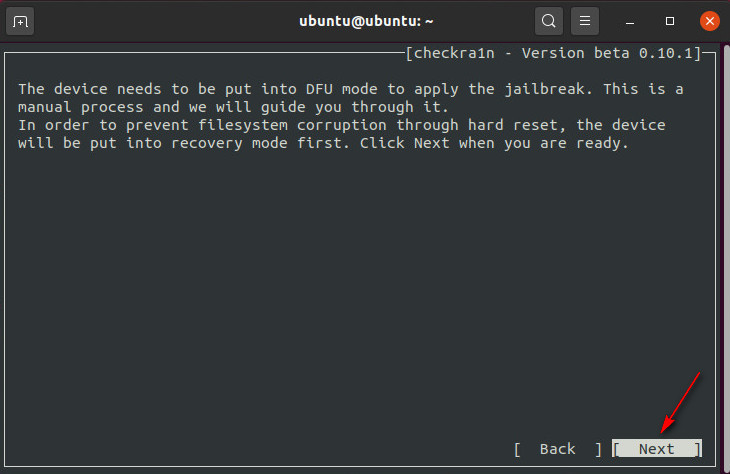
Step 9. Your iOS device will demand to be in recovery mode in order to be able to jailbreak your device. When the above message is displayed, select "Next".
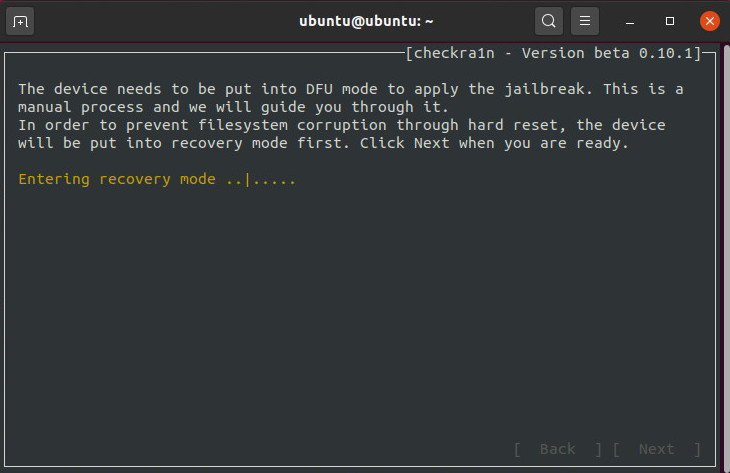
And then your iOS device will automatically enter recovery way with the help of Checkra1n.
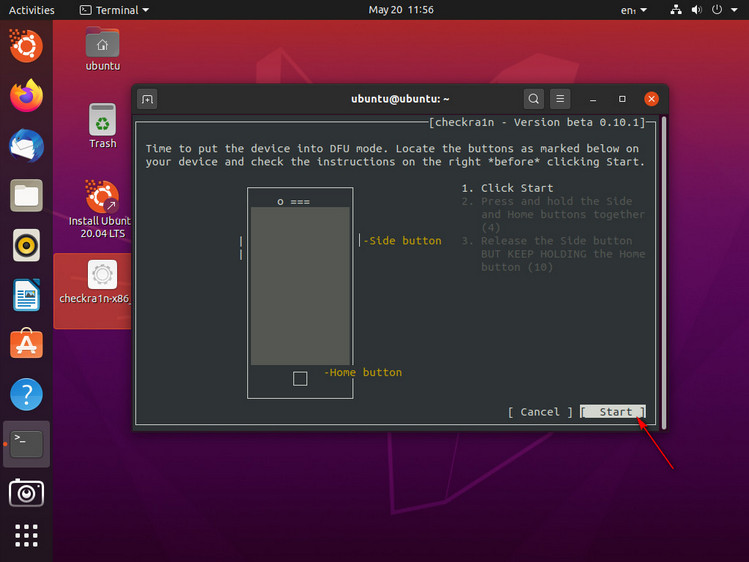
Select "Start". Checkra1n will display instructions for putting your iOS device into recovery mode, which yous will demand to follow.
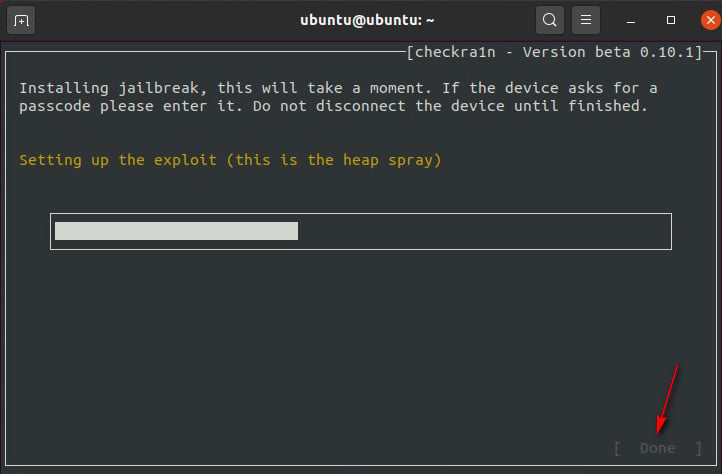
Once your device has successfully entered recovery style, the jailbreak will be installed immediately by Checkra1n. Afterward the jailbreaking process is consummate, select "Done".
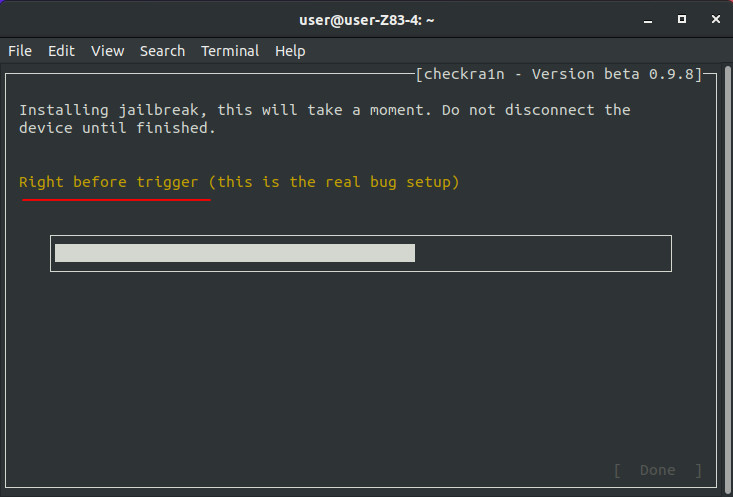
FAQ: What If the Jailbreaking Process Gets Stuck on "Right before trigger"?
You can endeavour the following solutions to fix the outcome of Checkra1n being stuck on the "Right before trigger (this is the real issues setup)" screen:
- Repeat the tutorial steps over again but using a different USB drive.
- Wink your iOS device, then restart your computer to attempt the jailbreaking process over again.
Annotation: If the jailbreaking process fails, please endeavor to jailbreak your phone once more by reconnecting your device to the USB port at the back of your computer's mainframe. The rear USB port is usually 2.0 as opposed to three.0, so compatibility volition be better.
Phase 4. Exit Ubuntu and Restart Your Estimator
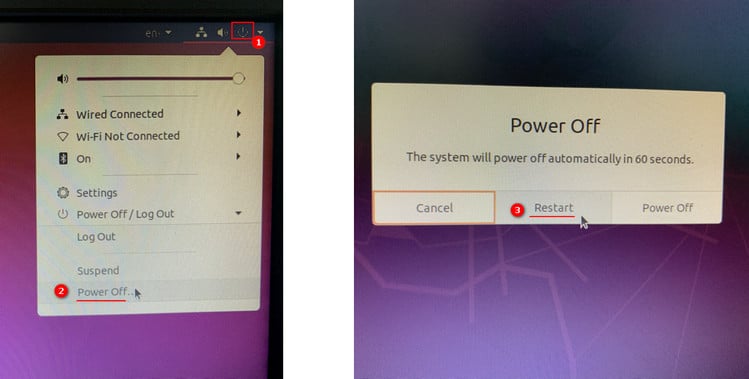
Step 10. Once the jailbreaking process has been completed successfully, go out Ubuntu, then restart your figurer. Select "Power" in the top right-hand corner, followed by "Ability Off", and then "Restart".
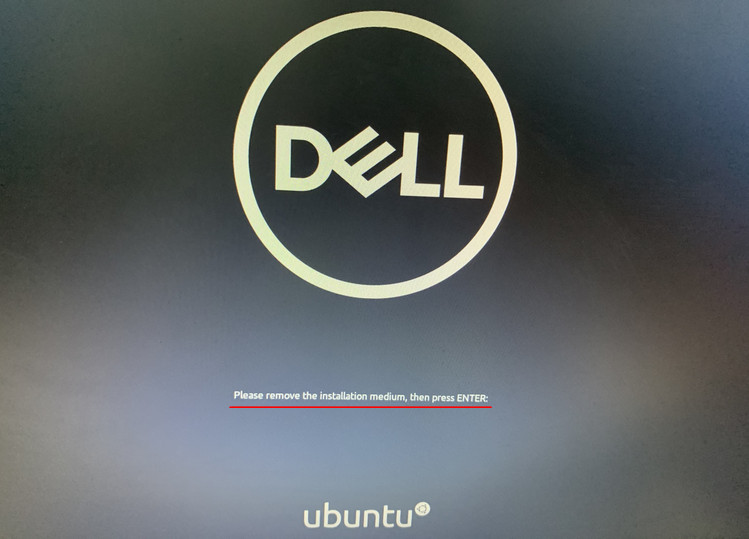
Disconnect your USB flash drive from the USB port on your computer, then press "Enter".
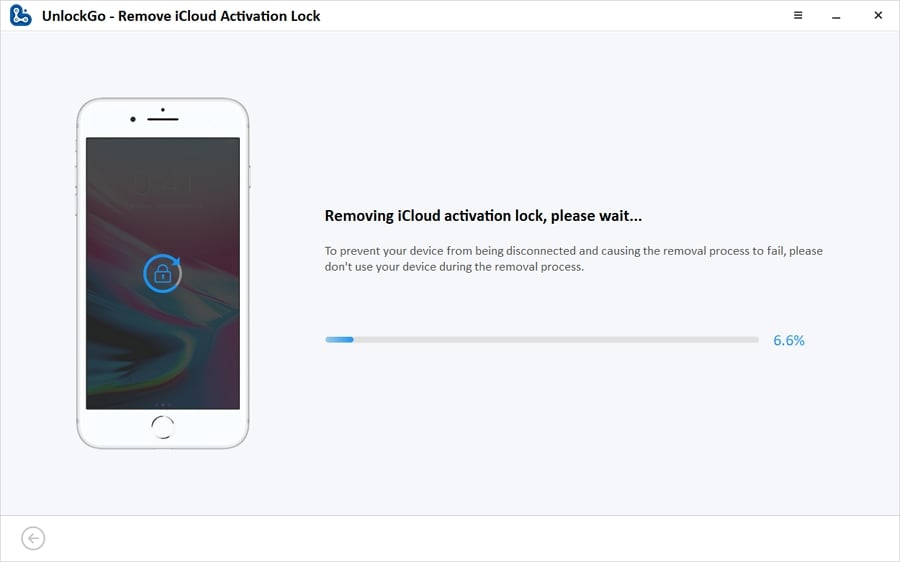
Stage five. Launch UnlockGo
When your calculator restarts, it will automatically enter the Windows operating system. To stop bypassing the iCloud activation lock screen, launch the Windows version of UnlockGo, then select "Start Bypass".
Source: https://itoolab.com/tips/how-to-jailbreak-ios-device-on-windows/
Posted by: bunchtheepost.blogspot.com
0 Response to "How To Jailbreak Ios 13 On Windows"
Post a Comment